Creating Tests
Learn how to create comprehensive automated tests using Testr's two powerful testing modes.
Overview
Testr offers two distinct approaches to test creation, each optimized for different use cases:
- 🎯 Step-by-Step Mode: Define precise, repeatable test instructions
- 🤖 AI Explorer Mode: Let AI intelligently navigate using natural language prompts
Step-by-Step Testing
When to Use
Step-by-Step testing is ideal when you need:
- Precise control over every test action
- Reproducible results with exact steps
- Specific verification points
- Predictable credit usage (1 credit per step)
Creating Step-by-Step Tests
- Navigate to Dashboard → Click "Create New Test"
- Configure Basic Settings:
- Test Name: Descriptive name (e.g., "User Login Flow")
- Target URL: Starting point for your test
- Description: Optional but recommended for context
- Select "Step-by-Step" Mode
- Define Your Steps:
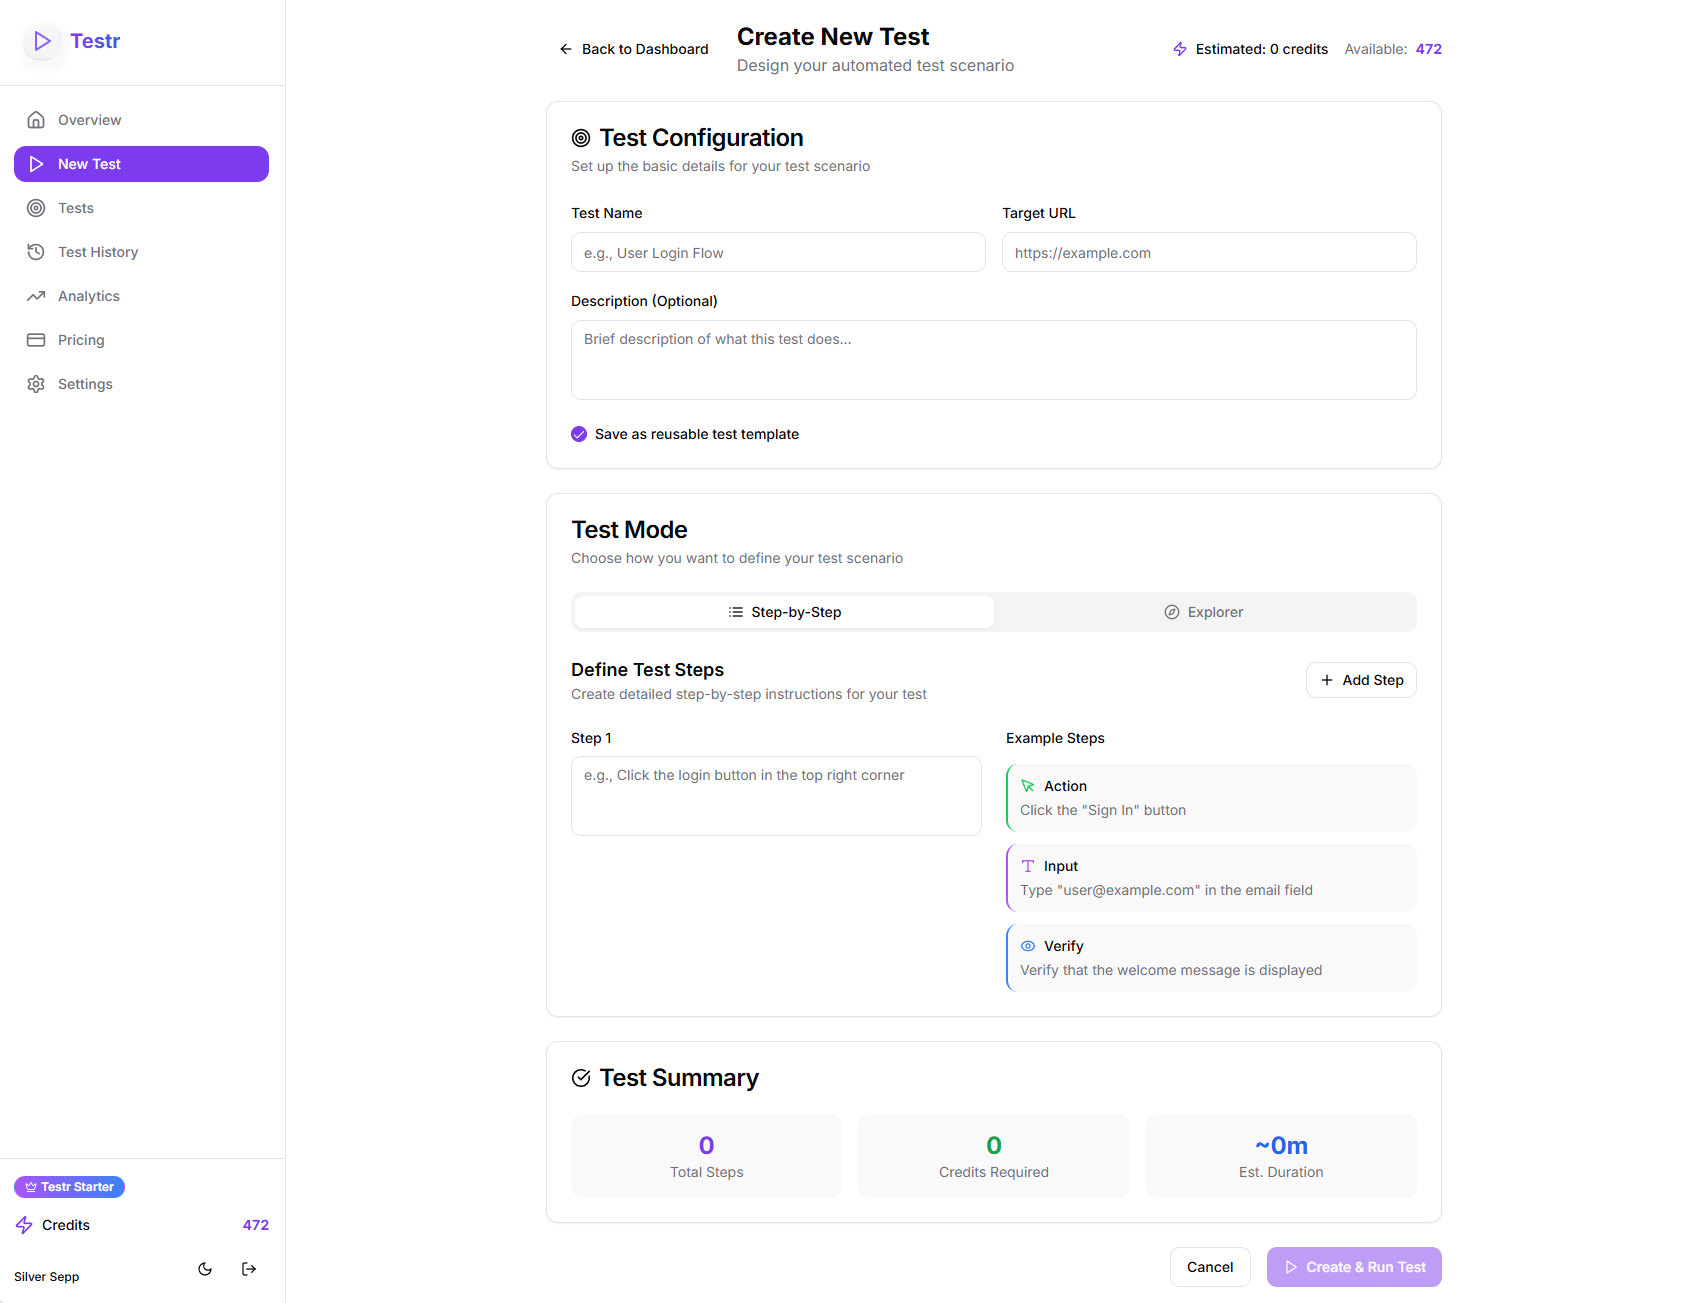 The test creation interface showing both Step-by-Step and AI Explorer modes
Step Types
Testr automatically categorizes your steps:
🖱️ Action Steps
- Click elements:
"Click the login button" - Navigate:
"Go to the checkout page" - Scroll:
"Scroll to the bottom of the page"
⌨️ Input Steps
- Type text:
"Type 'user@example.com' in the email field" - Select options:
"Select 'United States' from country dropdown" - Upload files:
"Upload profile picture from desktop"
👁️ Verification Steps
- Check content:
"Verify welcome message is displayed" - Validate forms:
"Ensure error message appears for invalid email" - Confirm state:
"Check that cart shows 3 items"
Step Writing Best Practices
✅ Be Specific
Good: "Click the blue 'Subscribe' button in the footer"
Bad: "Click subscribe"
✅ Use Clear Selectors
Good: "Type 'john@example.com' in the email input field"
Bad: "Enter email"
✅ Include Verification
Good: "Verify that 'Thank you for subscribing!' message appears"
Bad: "Check if it worked"
Example Step-by-Step Test
Test Name: "E-commerce Checkout Flow"
Target URL: https://store.example.com
Click on "Products" in the main navigation menuClick on the first product in the product gridClick the "Add to Cart" buttonVerify that "Item added to cart" notification appearsClick the cart icon in the top right cornerClick "Proceed to Checkout" buttonType "John Doe" in the full name fieldType "john@example.com" in the email fieldSelect "Credit Card" as payment methodVerify that the total price is displayed correctly
Estimated Cost: 10 credits
AI Explorer Testing
When to Use
AI Explorer testing excels for:
- Natural language descriptions of desired outcomes
- Exploratory testing of complex user journeys
- Flexible navigation without predefined paths
- Dynamic problem-solving when exact steps aren't known
Creating Explorer Tests
- Navigate to Dashboard → Click "Create New Test"
- Configure Basic Settings:
- Test Name: Goal-oriented name (e.g., "Newsletter Subscription")
- Target URL: Starting point (can be homepage)
- Description: Optional context for the AI
- Select "AI Explorer" Mode
- Write Your Task Description:
Task Description Guidelines
🎯 Be Goal-Oriented
Good: "Subscribe to the newsletter with email john@test.com"
Bad: "Click around the website"
📝 Include Context
Good: "Find and purchase a blue t-shirt in size medium, add to cart and proceed to checkout"
Bad: "Buy something"
🔍 Specify Success Criteria
Good: "Register a new account and verify the welcome email confirmation page appears"
Bad: "Sign up for an account"
Credit Budget Guidelines
Set appropriate credit limits based on task complexity:
- Simple tasks (3-5 credits): Single-page actions like newsletter signup
- Medium tasks (10-15 credits): Multi-step flows like product purchase
- Complex tasks (20+ credits): Full user journeys with multiple decision points
Example Explorer Tests
Simple Newsletter Signup
Task: "Subscribe to the newsletter using email test@example.com"
Credit Budget: 5 credits
Expected Outcome: AI finds newsletter form and subscribes
E-commerce Purchase Flow
Task: "Find a laptop under $1000, add it to cart, and proceed to checkout. Use test data for shipping information."
Credit Budget: 15 credits
Expected Outcome: AI navigates product catalog, filters, and completes checkout flow
Account Creation & Verification
Task: "Create a new user account with username 'testuser' and email 'test@example.com', then verify the account confirmation page loads"
Credit Budget: 10 credits
Expected Outcome: AI completes registration form and confirms success
Test Configuration Options
Save as Template
Check "Save as reusable test template" to:
- Create reusable test definitions
- Run the same test multiple times
- Share tests with team members
- Build a test library for regression testing
Target URL Guidelines
✅ Use Stable URLs
- Production or staging environments
- URLs that don't require authentication to access
- Homepage or specific landing pages
❌ Avoid
- Localhost URLs (use ngrok for local testing)
- URLs requiring login before test starts
- Temporary or development URLs
Advanced Techniques
Combining Modes
For complex scenarios, create multiple tests:
- Step-by-Step for critical, precise flows
- Explorer for edge cases and exploration
- Use templates to maintain consistency
Test Data Management
For Step-by-Step Tests:
- Include test data directly in steps
- Use realistic but safe test data
- Consider data cleanup in verification steps
For Explorer Tests:
- Embed test data in task descriptions
- Provide context for AI decision-making
- Specify data requirements clearly
Error Handling
Both modes automatically handle common issues:
- Element loading delays: Auto-wait for elements
- Network latency: Built-in timeouts and retries
- Dynamic content: Smart element detection
Cost Optimization
Step-by-Step Optimization
- Remove unnecessary verification steps
- Combine similar actions where possible
- Focus on critical path testing
Explorer Optimization
- Start with lower credit budgets
- Increase gradually based on task complexity
- Monitor AI efficiency in analytics
Next Steps
Once you've created your test:
- Monitor execution in real-time
- Analyze results to optimize future tests
- Set up MCP integration for programmatic test creation
Ready to run your first test? Learn about test execution and monitoring!