Getting Started
Welcome to Testr! This guide will help you get up and running with automated web testing in just a few minutes.
Prerequisites
- A web browser (Chrome, Firefox, Safari, or Edge)
- A website or web application to test
- A Testr account (sign up here (opens in a new tab))
Step 1: Create Your Account
- Visit testr.pro (opens in a new tab)
- Click "Sign Up" and create your account
- Verify your email address
- You'll start with free credits to begin testing
Step 2: Access the Dashboard
Once logged in, you'll see your main dashboard with:
- Test Overview: Recent test runs and status
- Credit Balance: Available credits for running tests
- Quick Actions: Create new tests, view analytics
- Recent Activity: Your latest test executions
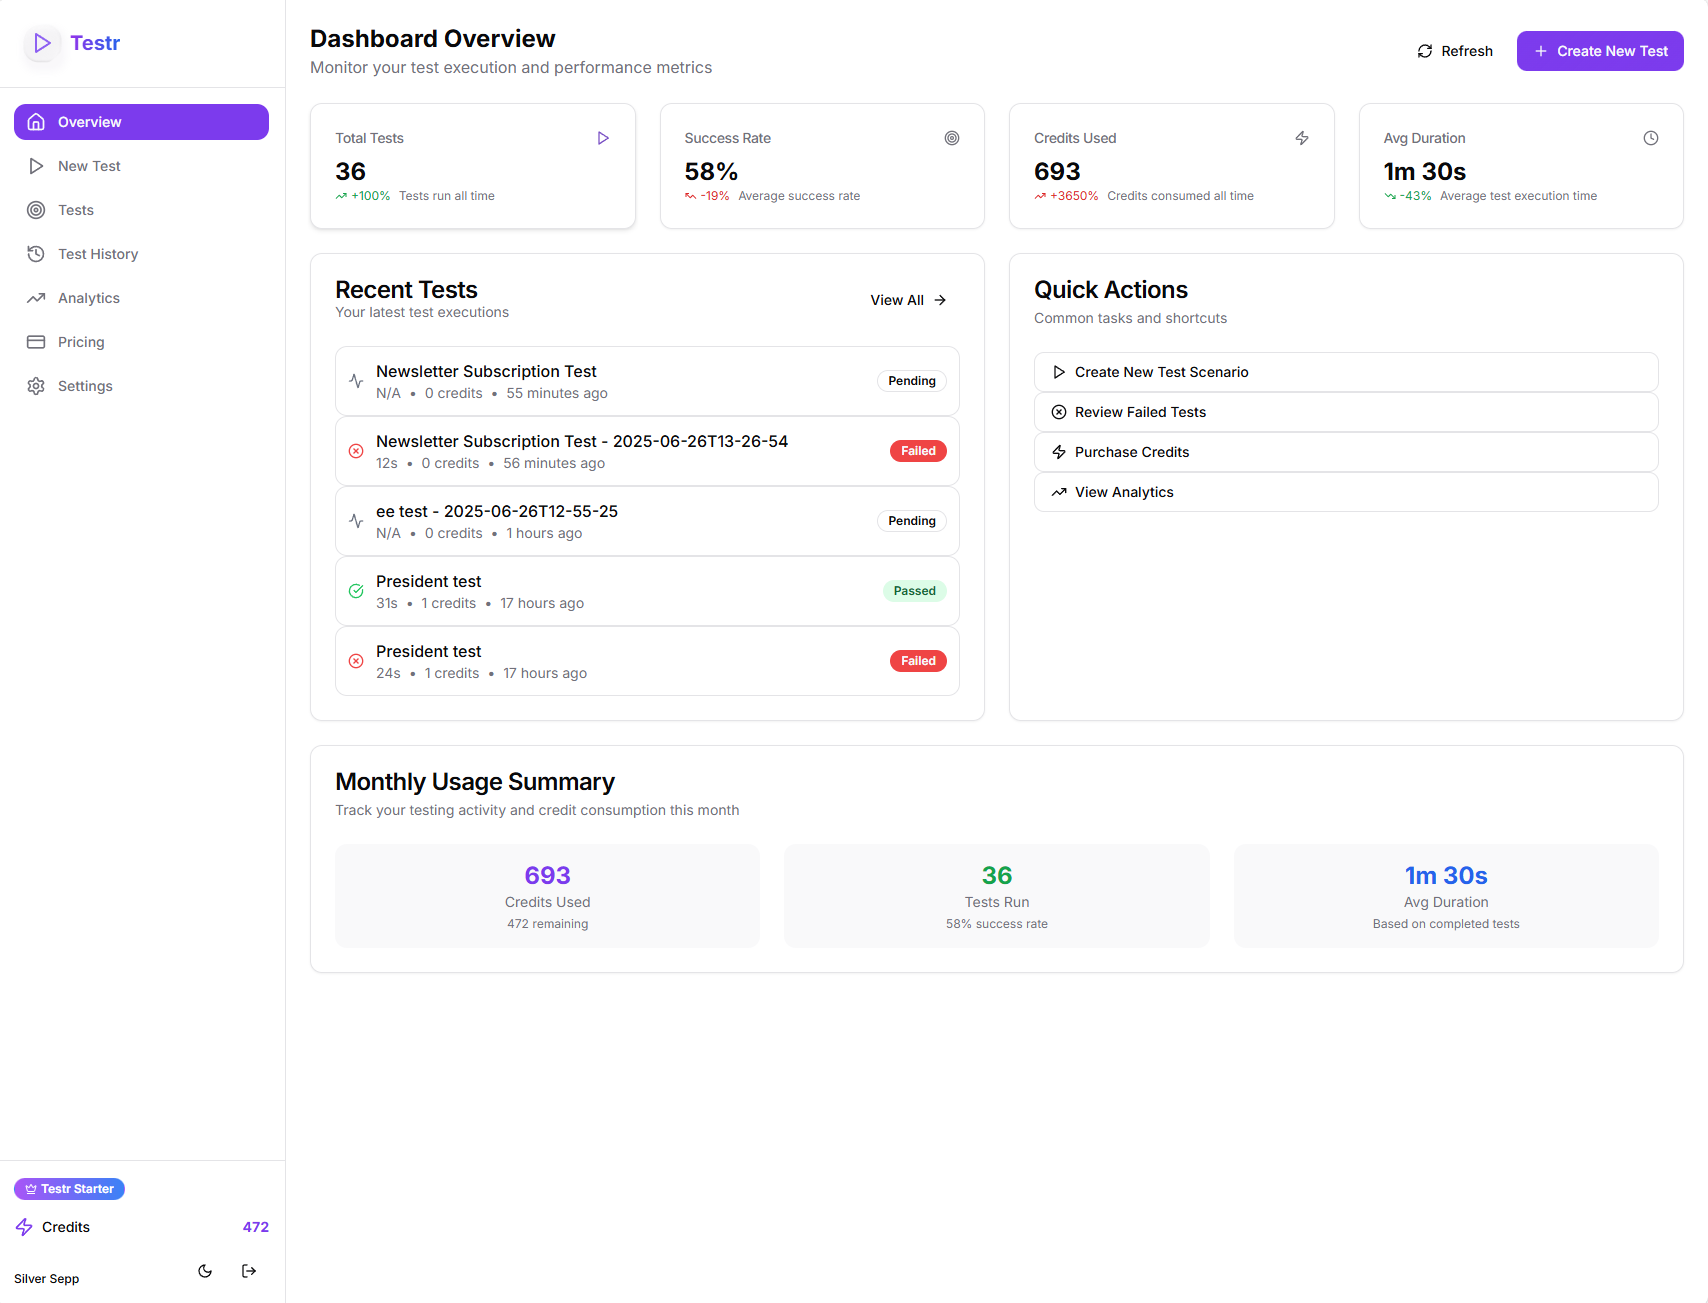 The main dashboard showing your testing overview, recent activity, and quick actions
Step 3: Understand the Credit System
Testr uses a credit-based system:
- 1 Credit = 1 Test Action (click, type, verify, etc.)
- Step-by-Step Tests: Each step costs 1 credit
- AI Explorer Tests: Configurable budget (1-20 credits recommended)
- Free Tier: Includes starter credits
- Additional Credits: Available via subscription plans
Step 4: Choose Your Testing Approach
Testr offers two powerful testing modes:
🎯 Step-by-Step Testing
Best for: Precise, repeatable tests with specific requirements
- Define exact actions: "Click the login button"
- Specify input values: "Type 'user@example.com' in email field"
- Add verification steps: "Verify welcome message appears"
- Predictable credit usage (1 credit per step)
🤖 AI Explorer Testing
Best for: Natural language testing and exploratory scenarios
- Describe goals: "Subscribe to the newsletter"
- Let AI navigate intelligently
- Automatic success/failure detection
- Variable credit usage (set your budget)
Step 5: Your First Test
Let's create a simple test to get familiar with the platform:
- Navigate to Dashboard → Click "Create New Test"
- Enter Basic Details:
- Test Name: "Homepage Navigation Test"
- Target URL: Your website's homepage
- Description: Optional but recommended
- Choose Test Mode: Start with "AI Explorer" for simplicity
- Set Explorer Prompt: "Navigate to the contact page and verify it loads"
- Set Credit Budget: 5 credits (conservative for first test)
- Save as Template: Check this to reuse later
- Click "Create & Run Test"
Step 6: Monitor Your Test
Once your test starts running, you'll see:
- Real-time Progress: Current step and overall completion
- Live Screenshots: What the browser currently sees
- Step Status: Which actions succeeded or failed
- Credit Usage: How many credits have been consumed
Step 7: Review Results
After completion, you'll have access to:
- Execution Video: Full GIF recording of the test run
- Step-by-Step Breakdown: Detailed action log
- Success/Failure Status: Clear pass/fail indication
- AI Insights: Why actions were taken (for Explorer tests)
Common First Test Ideas
E-commerce Sites
- "Add a product to cart and proceed to checkout"
- "Search for 'laptop' and view the first result"
- "Navigate to customer support page"
Business Websites
- "Fill out the contact form with sample data"
- "Subscribe to the newsletter"
- "Navigate through the main menu sections"
Web Applications
- "Create a new account with valid information"
- "Log in with existing credentials"
- "Navigate to user settings page"
Best Practices for Beginners
🎯 Start Simple
- Begin with basic navigation tests
- Use AI Explorer mode for first tests
- Keep credit budgets conservative (5-10 credits)
📝 Clear Descriptions
- Use specific, actionable language
- Include expected outcomes
- Mention any test data requirements
🔄 Iterate and Improve
- Review failed tests to understand issues
- Adjust prompts based on results
- Save successful tests as reusable templates
💡 Use Realistic Data
- Provide sample email addresses, names, etc.
- Consider edge cases for form inputs
- Test with different user scenarios
Next Steps
Now that you've run your first test:
- Learn about Creating Tests - Deep dive into both testing modes
- Explore Test Execution - Advanced monitoring and debugging
- Set up Analytics - Track your testing patterns and success rates
- Try MCP Integration - Connect with AI assistants like Claude
Getting Help
- Documentation: Browse these guides for detailed information
- Support: Email support@testr.pro
- Community: Join our Discord (opens in a new tab) for tips and discussions
Ready to create more sophisticated tests? Continue to Creating Tests!